

Hail Repair Process
Timeline of a Complete Hail Repair

FSDAVCFEBFEVSDDVFSD
FSDAVCFEBFEVSDDVFSD

FSDAVCFEBFEVSDDVFSD
Day 0: Initial Vehicle Inspection and Detailed Photo Walk-Around
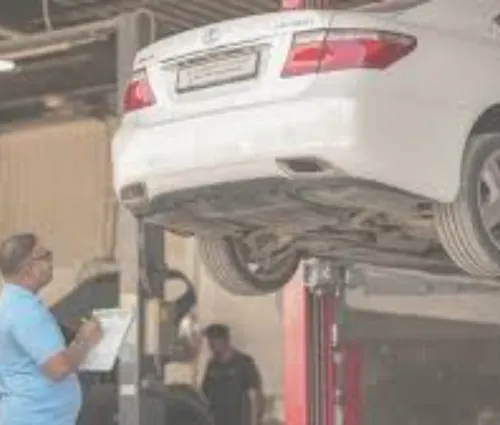
Most hail jobs begin with a curbside greeting and a slow walk around the vehicle under soft outdoor light. The estimator uses a paint depth gauge and a small mirror to spot even pebble-sized impacts on roof rails, hood edges, and beltlines. Each dent is circled with removable tape, and high-resolution photos are snapped so you and the insurance adjuster see identical evidence.
Within fifteen minutes you receive a digital scan on a tablet showing panel counts, dent sizes, and any cracked paint. You can approve the inspection on-screen or request an emailed copy for later. This instant summary launches the official claim and locks the starting odometer mileage, protecting you from unrelated scratches that might appear while the car sits outside waiting for an adjuster. No paperwork is lost.
Day 1: Estimate and Insurer Approval
The estimator uploads the photo set into specialized software that counts dents by size and automatically prices labor. The system flags large impacts needing glue pulls or brace removal and notes panels where paint is cracked. A human review follows to verify accuracy and add clips, glass seals, or moldings. The completed estimate arrives in your inbox as a PDF before lunch, ready for the insurance portal.
Most carriers respond within twenty-four hours. If totals match their database, approval is immediate and parts can be ordered the same afternoon. When numbers differ, a remote adjuster schedules a quick video call with our estimator to zoom in on contested panels. Because high-resolution photos and measurements are already logged, these supplement discussions rarely last more than ten minutes, keeping the timeline tight.
Once green-lit, you receive a text confirming coverage, deductible amount, and estimated repair start date. Reply yes promptly to lock the slot. Early confirmation means panels arrive on time, eliminating idle days and positioning your vehicle at the front of the next morning’s production queue.
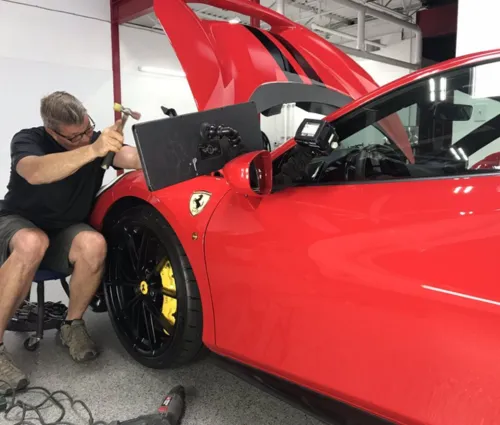
Day 2–3: Precision Paintless Dent Repair
With approvals signed, a master PDR technician rolls the vehicle into a well-lit bay and removes interior trim to open access points.Specialized rods, levers, and soft-tip hammers glide behind braces to nudge metal upward in pencil-thin increments. Reflection boards highlight highs and lows so every push is measured.
Sharp dents on body lines require glue pulling. The tech warms the panel to relax paint, attaches a disposable tab, and uses a slide hammer to lift the metal surface. Remaining crowns are tapped flat, restoring a smooth curve without filler or sanding. Sensors and airbags remain untouched.
Throughout the session progress photos land in your customer portal every hour. If hidden damage appears, the tech pauses, updates the estimator, and secures insurer approval before continuing. Average midsize cars finish within six labor hours; trucks with aluminum panels may take eight. Once dents vanish, trim is reinstalled, battery memory reset, and safety modules scanned. A “PDR complete” text with a polarized-light slideshow lets you review results remotely in crisp high definition.
Next, the vehicle rolls into a soft-water wash bay where foam cannons lift dust released during panel massage. This gentle rinse exposes any missed dings that hide under dirt. A second inspection with strip lights verifies reflections stay straight across the hood, roof, and door tops. If even a pinhead impression remains, the tech reopens trim and corrects it before moving forward,no shortcuts.
A quality-control inspector, separate from the repair team, reviews the work order against a checklist of forty points: clip count, airbag codes, sunroof drains, and paint thickness readings on every panel touched. Findings are uploaded, and you receive another text confirming “QC Passed.” Only then is the interior vacuumed, floor mats shampooed, and windows polished for delivery. Total bay time to this milestone averages two business days,about half the regional industry norm,thanks to Dentex Midwest’s synchronized auto hail workflow and zero idle-time scheduling approach, on most jobs.
Day 4: Supplemental Approvals and Updates
Most repairs finish without surprises, but flattened foam seals or cracked windshield moldings occasionally appear after the final wash. The estimator photographs any new issues, prices parts, and sends a supplement request through the insurance portal. Because the claim already contains extensive imagery, many carriers approve within a few hours, keeping the timeline intact.
You see every supplement in real time via the customer dashboard. A colored progress bar marks tasks,blue for awaiting approval, green for scheduled, gray for completed. Push notifications alert you when the part order ships and again when mechanics finish installation. This transparency removes guesswork and prevents the classic “call me next week” frustration.
Meanwhile, the vehicle moves to detailing. Clay bars lift rail dust, and a non-wax sealant enhances gloss without hiding micro flaws. Interior plastics receive a hypoallergenic wipe-down so the cabin smells fresh, not chemical. Before sunset you receive a 360-degree video along with a firm pickup window. Average industry cycle time is ten days; with this proactive PDR timeline, Dentex Midwest averages just five in most cases.
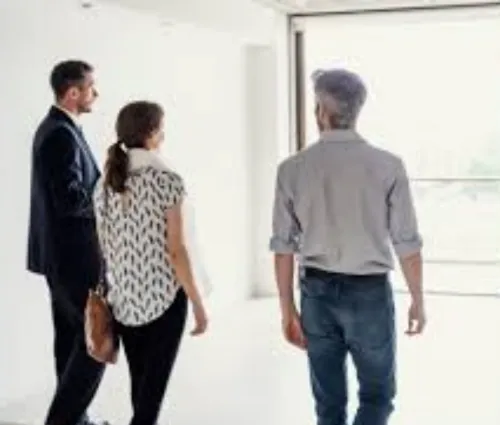
Delivery Day: Final Walk-Through Checklist
At pickup, the service advisor greets you with the original estimate, supplement sheet, and warranty. Together you inspect the car under adjustable LED lights, comparing each panel to the pre-repair photo set on a tablet. Any lingering concern is corrected on the spot.
The advisor reviews post-scan diagnostics showing zero error codes and explains care tips: wash with pH-neutral soap, avoid automatic brushes for one week, and schedule a free ding check after the first storms of next season. You sign the warranty and digital payment concludes.
Keys and remote fobs are sealed in an envelope that lists your repair reference number and QR link to images. Should a resale question arise years later, the archive proves original paint remained. You leave knowing what happened at every stage and why the timeline mattered.
Need flexibility? Our after-hours locker lets you pick up outside business time. Enter the one-time code from your phone, retrieve keys, and drive away knowing paperwork is already emailed. Should the weather forecast call for hail overnight, we’ll happily keep the car indoors at no charge until skies clear. This final option saves garages without space and reinforces Dentex Midwest’s commitment to a customer-first hail repair process Missouri residents trust year after year. You can even rate the experience through a two-step survey that rewards feedback with a wash voucher.
Speed tips for a shorter cycle
File your claim the same day the storm passes. Early submission places you ahead of the surge that can clog insurer call centers for weeks. Upload clear photos in shade, include the VIN, and confirm coverage limits in the first message. Adjusters prioritize complete files and often approve straightforward hail jobs within twenty-four hours.
Choose repair dates immediately after approval and stick to them. Delays waiting for vacation or bonus checks can push your car behind dozens of new claims. Dentex Midwest allows free rescheduling within forty-eight hours, but blocking a firm slot keeps parts flowing. Authorize supplemental parts decisions,like moldings or clips,by text so technicians don’t pause work while calling for permission.
Keep communication channels open. Respond to progress texts promptly, and review photo updates the day they arrive. If you see a missed ding, mention it early; fixes made before reassembly add minutes, not hours. Arrange payment two days before pickup to avoid finance-office waits. Provide a secondary contact in case your phone is unreachable, ensuring no lull in the workflow. Follow these simple habits and you could shave two full days off the average auto hail workflow, driving home sooner with stress and cost for you.

Dentex Midwest
Professional Hail Repair & PDR
Stay Up-to-date With Our Content
Subscribe to learn more about our mission!
Stay Up-to-date With Our Content
Subscribe to learn more!
Contact Info
Service Hours
Social Media
Home
Services
Service Areas
Blog
About
Contact
Contact Info
Service Hours
Mon - Fri: 8:00 am – 6:00 pm
Saturday: by Appointment
Sunday: Closed
Social Media
Licensed, bonded, & insured